Stuffed toy crochet pattern - Elley the Elephant
There is a story behind creating this design. I was busy with my crochet projects when my daughter was watching me intently. She came up to me slowly and said, 'Mommy, I want a toy elephant.' She's only 8 years old, and no one can refuse her innocent demand. So, I created this design just like that. She loves it very much and sleeps hugging it every day. I can't describe the feeling it gives me."
"So, Let's dive into the wonderful world of crafts and creativity, where crocheting shines as a timeless art form! With just a hook and some yarn, you can turn your imagination into reality. And guess what's stealing hearts everywhere? The adorable crochet elephant! 🐘 It's not just cute; it's a symbol of wisdom, strength, and good luck. So, let's chat about how you can make your very own crochet elephant – perfect for cuddling, gifting, or adding charm to your home decor. Ready to get started on this fun journey?"

Disclosure
This blog may contain affiliate links, meaning I may earn a small commission if you purchase through these links at no extra cost to you. As an affiliate, I only recommend products or services I personally use and believe will add value to my readers.
YARN:
Hey, when it comes to making your crochet elephant, you've got options! Any amigurumi yarn will do, but I recommend 100% cotton yarn for that soft, cuddly feel. Personally, I used 'Kotton' yarn by Magic Needles – it's great for amigurumi, but it's on the thinner side. So, heads up, it took me a bit longer to whip this up. If you're all about speed, go for a cotton blend yarn that's thicker. Either way, you'll end up with a fantastic elephant buddy!

The yarn I have used. This is not an advertisement but only for information I have used this picture.
Second yarn is pink, which is of same yarn but change in color.
The yarn I have used is kotton 4 ply yarn. If it is not available in your area or country, pls use yarn cascade ultra pima fine or cascade botanica or Debbie bliss eco baby or schachenmayr catania or you can use scheepjes catona. It is similar yarn which I have used. These all yarns are from Lovecrafts .
Hook:
I have use 3mm hook but You can choose the size of the crochet hook according to your yarn.
PATTERN:
In this fantastic pattern, you'll discover an abundance of helpful photos, like a personal crafting companion guiding you through each stitch. And with handy video tutorials at your fingertips, creating your masterpiece becomes as effortless as a breeze on a sunny day!
This handmade creation is sure to bring joy and warmth wherever it goes. Its soft texture and playful design make it irresistible to both children and adults alike, making it a versatile and timeless piece of craftsmanship.

One of the most special aspects of creating a crochet elephant is the love and care that goes into each stitch. Unlike store-bought toys, handmade creations like this elephant are infused with the passion and creativity of the crafter, making them truly one-of-a-kind. The process of crocheting can be therapeutic and meditative, allowing you to pour your heart into each creation and infuse it with positive energy and intention.
Crocheting a handmade elephant is a labor of love that results in a unique and special creation.
The act of crafting with your hands can be a soothing and rewarding experience.
Gift a crochet elephant to a friend or loved one to show them how much you care.
Let's get started
★Notes:
● Skill level -
Beginner and Intermediate
● Finished size when seated -
8.5 inch
● Finished size standing -
12.5 inch
★Materials:
To get started, Gather your Crochet essentials:
● Yarn :
100% cotton yarn, super fine (weight-1)
NOTE: Cotton blends works too. I use magic needle 4 ply
yarn for pink and gray, nako solar for white.
● Yarn Colour: -
➔ Gray : 100% Cotton yarn
➔ Black : Embroidery yarn
➔ Pink : 100% Cotton yarn
➔ White : Cotton blend yarn
NOTE: Gray 1 ball of 300 meters, pink about 100 meters,
white about 50 meter , some of embroidery black and white
yarn.You may use the color of your choice but do keep the
types same.
● Hook:
3mm (It may be different for your yarn) and 5mm (for make tail
only)
● Fiber fill
● Yarn needle
● Scissors
● Stitch marker or a piece of yarn
● Pins with large head will help for assemble
Abbreviation used:
● mr: Magic Ring
● sc: Single Crochet
● inc: Increase
● dec: Decrease
● f/o: Finish Off
● st(s): Stitch(es)
● ch: Chain
● sl st: Slip Stitch
● (....) × n: process repeat n(whichever number written) numbers
● [....]: total stitches at the end of round
● tog sc: Together single crochet
● blo: Back Loop Only
Pattern steps:
Make the body
Rnd 1 - mr [6 sc]
Rnd 2 - Inc in each st around [12]
Rnd 3 - (sc in next st,inc) × 6 [18]
Rnd 4 - (sc in next 2st,inc) × 6 [24]
Rnd 5 - (sc in next 3st,inc) × 6 [30]
Rnd 6 - (sc in next 4st,inc) × 6 [36]
Rnd 7 - (sc in next 5st,inc) × 6 [42]
Rnd 8 - (sc in next 6st,inc) × 6 [48]
Rnd 9 - (sc in next 2st,inc) × 6 [54]
Rnd 10 - sc in each st around [54]
Rnd 11 - (sc in next 8st,inc) × 6 [60]
Rnd 12 - (sc in next 9st,inc) × 6 [66]
Rnd 13 - (sc in next 10st,inc) × 6 [72]
Rnd 14 - sc in each st around [72]
Rnd 15 - (sc in next 11st,inc) × 6 [78]
Rnd 16-30 - (sc in next 12st,inc) × 6 [84]
Rnd 31 - (sc in next 12st,dec) × 6 [78]
START STUFFING THE BODY
Rnd 32 - sc in each st around [78]
Rnd 33 - (sc in next 11st,dec) × 6 [72]
Rnd 34 - sc in each st around [72]
Rnd 35 - (sc in next 10 st,dec) × 6 [66]
Rnd 36-37 - sc in each st around [66]
Rnd 38 - (sc in next 9st,dec) × 6 [60]
Rnd 39 - sc in each st around [60]
Rnd 40 - (sc in next 8st,dec) × 6 [54]
Rnd 41 - sc in each st around [54]
Rnd 42 - (sc in next 7st,dec) × 6 [48]
Rnd 43 - sc in each st around [48]
Rnd 44 - (sc in next 6st,dec) × 6 [42]
Rnd 45 - sc in each st around [42]
Rnd 46 - (sc in next 5st,dec) × 6 [36]
Rnd 47-48 - sc in each st around [36]
f/o, fill fiber full of the body, let the hole open to sew the head
Create Head
Rnd 1 - mr [6 sc]
Rnd 2 - Inc in each st around [12]
Rnd 3 - (sc in next st,inc) × 6 [18]
Rnd 4 - (sc in next 2st,inc) × 6 [24]
Rnd 5 - (sc in next 3st,inc) × 6 [30]
Rnd 6 - (sc in next 4st,inc) × 6 [36]
Rnd 7 - (sc in next 5st,inc) × 6 [42]
Rnd 8 - (sc in next 6st,inc) × 6 [48]
Rnd 9 - (sc in next 2st,inc) × 6 [54]
Rnd 10 - (sc in next 8st,inc) × 6 [60]
Rnd 11 - (sc in next 9st,inc) × 6 [66]
Rnd 12-31- sc in each st around [66]
Rnd 32 - (sc in next 9st,dec) × 6 [60]
START STUFFING THE BODY
Rnd 33 - (sc in next 8st,dec) × 6 [54]
Rnd 34 - (sc in next 7st,dec) × 6 [48]
Rnd 35 - (sc in next 6st,dec) × 6 [42]
Rnd 36 - (sc in next 5st,dec) × 6 [36]
Rnd 37 - (sc in next 4st,dec) × 6 [30]
Rnd 38 - (sc in next 3st,dec) × 6 [24]
Rnd 39 - (sc in next 2st,dec) × 6 [18]
Rnd 40 - (sc in next st,dec) × 6 [12]
Rnd 41 - dec × 6 [6] f/o
Pack the hole
Ears
Rnd 1 - mr [6 sc]
Rnd 2 - Inc in each st around [12]
Rnd 3 - (sc in next st,inc) × 6 [18]
Rnd 4 - (sc in next 2st,inc) × 6 [24]
Rnd 5 - (sc in next 3st,inc) × 6 [30]
Rnd 6 - (sc in next 4st,inc) × 6 [36]
Rnd 7 - (sc in next 5st,inc) × 6 [42]
Rnd 8 - (sc in next 6st,inc) × 6 [48]
Rnd 9 - (sc in next 2st,inc) × 6 [54]
Rnd 10 - (sc in next 8st,inc) × 6 [60]
f/o , leave a long tail for sew
Crochet Legs Trunk magic
Legs
Rnd 1 - mr [6 sc]
Rnd 2 - Inc in each st around [12]
Rnd 3 - (sc in next st,inc) × 6 [18]
Rnd 4 - (sc in next 2st,inc) × 6 [24]
Rnd 5 - (sc in next 3st,inc) × 6 [30]
Rnd 6 - (sc in next 4st,inc) × 6 [36]
Rnd 7 - (sc in next 5st,inc) × 6 [42]
Rnd 8-11 - sc in each st around [42]
START STUFFING
Rnd 12 - (sc in next 5st, dec) × 6 [36]
Rnd 13-14 - sc in each st around [36]
Rnd 15 - (sc in next 4st, dec) × 6 [30]
Rnd 16 - sc in each st around [30]
Rnd 17 - (sc in next 3st, dec) × 6 [24]
Rnd 18-21 - sc in each st around [24]
Rnd 22 - (sc in next 6st, dec) × 3 [21]
Rnd 23 - sc in each st around [21]
Rnd 24 - (sc in next 5st, dec) × 3 [18]
STOP STUFFING
Rnd 25 - sc in each st around [18]
Rnd 26 - (sc in next 4st, dec) × 6 [15]
Rnd 27-29- sc in each st around [15]
sc the opening together to close the leg.
f/o and leave a long tail for sewing.
Trunk
Rnd 1 - mr [6 sc]
Rnd 2 - Inc in each st around [12]
Rnd 3 - (sc in next st,inc) × 6 [18]
Rnd 4 - (sc in next 2st,inc) × 6 [24]
Rnd 5 - sc(blo) in each st around [24]
Rnd 6-14 - sc in each st around [24]
Rnd 15 - tog sc , sc * 22 [23]
Rnd 16 - tog sc, sc * 21 [22]
Rnd 17 - tog sc, sc* 20 [21]
Rnd 18 - tog sc, sc * 19 [20]
Rnd 19 - sc in each st around [20]
Rnd 20 - tog sc, sc * 18 [19]
Rnd 21 - tog sc, sc * 17 [18]
Rnd 22 - tog sc, sc * 16 [17]
Rnd 23 - sc in each st around [17]
Rnd 24 - tog sc, sc * 15 [16]
Rnd 25 - tog sc, sc * 14 [15]
Rnd 26 - tog sc, sc * 13 [14]
START STUFFING
Rnd 27 - tog sc, sc * 12 [13]
Rnd 28-30 - sc in each st around [13]
Rnd 31 - tog sc, sc * 11 [12]
Rnd 32-37 - sc in each st around [12]
Rnd 38 - (sc in next st, dec ) * 4 [8]
Rnd 39 - (sc in next st, dec ) * 4 [4]
f/o and leave a long tail for sewing, for the tog sc
Curve The Trunk:
With the help of a tapestry needle, from row 28, we tie together the stitch of row 28 and row 26
tightly, this will make a curve on our trunk, we can make 2 to 3 curves on this trunk like this.
Take reference from the pictures below:
Embroider the trunk with Black embroidery thread.
Crochet Hands
Rnd 1 - mr [6 sc]
Rnd 2 - Inc in each st around [12]
Rnd 3 - (sc in next st,inc) × 6 [18]
Rnd 4 - (sc in next 2st,inc) × 6 [24]
Rnd 5 - (sc in next 3st,inc) × 6 [30]
Rnd 6 - (sc in next 4st,inc) × 6 [36]
Rnd 7-9 - (blo IN ROW 7) , sc in each st around [36]
Rnd 10 -(sc in next 4 st , dec) × 6 [30]
Rnd 11-13 - sc in each st around [30]
Rnd 14 - (sc in next 3st , dec) × 6 [24]
Rnd 15-16 - sc in each st around [24]
START STUFFING
Rnd 17- (sc in next 6st , dec) × 3 [21]
Rnd 18-19 - sc in each st around [21]
Rnd 20 - (sc in next 5st , dec) × 3 [18]
Rnd 21-24 - sc in each st around [18]
Rnd 25 - Dec, sc in next 16 st [17]
Rnd 26-27 - sc in each st around [17]
STOP STUFFING
Rnd 28 - Dec, sc in next 15 st [16]
Rnd 29-31 - sc in each st around [16]
Rnd 32 - sc the opening together to close the arm .f/o , Leave a long tail for sewing.
Crochet Toes
1 - chain 15
2 - Dc on chain(st) 4 from the hook
3 - Dc on st 5
4 - 2 chain
5 - sl st in next st
6 - sl st again in next st
7 - 2 chain
8 - repeat process from 2 to 7 until you reach at the last stage
Make Eyes
White
1 - 6 chain, 1 sc into 2nd st from the hook, 3sc in next st. Now continue to crochet on the
underside of the chain. Continue to crochet as usual. 3sc ( 1sc , inc ) (11 st) , 1 sl st.
2 - {3sc, (1 inc)} repeat 3 times.
Black
Rnd 1 - mr [6]
Rnd 2 - inc × 6 [12]
f/o
Embroider with white yarn as photos
Make skirt
1. 85 chains
2. From second chain, Sc in each stitch [84]
3. Sc in each stitch (FLO) [84) . At the end , join starting and ending with sl st to give a
round shape to the skirt.
4. 1 chain, Sc in each st [84] join the starting and ending points with sl st.
5. 2 chains ,Dc in each st [84]. join the starting and ending points with sl st.
6. 3 chains, Tc in each st [84] . join the starting and ending points with sl st.
7. 2 chain, 2 Dc in each st. [168]
8. 3 chain , Tc in each st [168]
9. f/o
Make flowers for skirt(make 2)
IN mr (3 chain,2dc,3 chain,sl st) * 5
f/o leave a long tail for sew
Attach this to closures of the skirt
Tail
1. To make a tail , take a long piece of yarn (of gray color) and make it double , now repeat
this doubling process untill you have 8 layer thick yarn.
2. Make 6 chains with the help of a 5 mm hook.
3. f/o.
Attach it to the back of the body between the row 19 and 20
Headband
FROM WHITE YARN
● Make a flower
In mr ( 3 chain, 1dc , 3 chain, Sl St ) *5 . This makes 5 patels. Close the mr .
● 11 chain
Make center part of the flower
1. 3 chain, 6hdc in 4th chain from the hook ,sl st at the first hdc.
2. Make 8 chains.
Repeat the process for making total 3 center parts of the flower.
● 11 chain
● (3chain , 1dc , 3 chain , sl st)*4
Make petals of the flower
FROM PINK YARN
1. In first center of flower, here we see some stitches over the center of the flower,
from the fourth stitch we take pink yarn into it and make a sl st and then follow
the pattern– 3 chain , 1 hdc , 1 sl st (in same stitch) – that is make half flower
2. In next two stitches – sl st , 1 hdc , 2 dc , 1 hdc , sl st
3. In next stitch – sl st , 1 hdc , 1dc
4. 1 chain
5. Switch to next center part of flower
6. Repeat the process for the next two center parts.
7. When reaching at the last , complete the patel by– 1 dc , 1hdc , sl st.
8. Now make another two patel by using this pattern – sl st , 1hdc , 2 dc , 1 hdc , sl
st
9. Now complete 2 more flowers.
10. At the end f/o , cut the yarn and hide it
Assemble
For the sewing ,first attach the part (which you are going to sew) with the pin for neat sewing
● Sew head from body
● Attach the hands and legs
● Sew the toes , it must be front side of the arms and legs
● Now sew the trunk
● Sew ears first from the eyes .
● Then sew the eyes and embroider the eyelashes and eyebrows with the black yarn
● Now sew the skirt and headband
Printable pdf
You can find this cute and huggable toy's pattern with photos on Ravelry and Lovecrafts
You might also like-
If you like amigurumies then you can also try the doll the princess pattern. It is very easy to make.I have designed some pouches like snowblue pouch, carryall pouch, leaf design pouch, diamond waffle pouch, you can check all of them.These are made very quickly and are usually needed by everyone as they keep even the smallest of things organized.And if things are organised then life becomes easier. Isn't it?☺️
Final Thought
Now you have this pattern, so it is your turn to make it. Whether you make it in this color or try a new color, it will always look beautiful You can add many things to it like a small bow, a scarf or some embroidery details.I would love to see your creations. So be sure to share your creations with me, you can also tag me on Instagram for this.Happy crocheting, and enjoy making your new elephant friend!
"I just made this latest pouch design! If you like it, feel free to check it out."
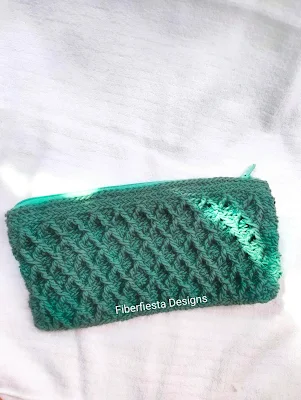
"For more updates on similar unique patterns and promotion alerts, you can join our Facebook group."

Comments
Post a Comment
Comments pls